Here's how we did it. We started by removing all of the cabinet doors and then pulled on our big girl pants (mom and I) and scrubbed the insides of the cabinets. Our cabinet interiors was unexpectedly scary.

Just kidding. It's like I say in my blog title, "Mostly facts, some fiction." Factually, most of them looked as though they had not been scrubbed since the house was originally built in 1961.
Now you see a door.

Now you don't. It's magic; I can tell that you're mystified right now. Don't be scared.

You can see that even without the doors there is a ton of cabinet surface to paint.


After the scrubbing came a little light sanding. We were lucky that our cabinets were solid wood throughout and did not have a heavy varnish on them. We tried a couple of different methods for painting the interiors of the cabinets, including spray paint, which we do not recommend. In the end it was easiest to use a small cabinet and doors roller (you can purchase these at any paint/home improvement store). They work great and give you even coverage.

After many, many coats of Valspar's Du Jour in semi-gloss finish we had all of the interiors and bases painted. We did this over the course of a few days to allow them to fully dry.

Look how happy we are! We started with this set of cabinets and were still very optimistic that it wouldn't take long at all. We were so wrong, but we did have fun.

This is clearly not a fashionable post. When working on one's house it is very important to look as unfortunate as possible. I did a pretty good job of that, if I do say so myself. (Pregger belly hanging over the jeans is clutch)

The cabinet doors were an entirely different beast that I wrestled with for weeks. The cabinet interiors taught me a valuable lesson: primer will save you time and paint. You will also need a good pair of work gloves, unless you don't mind having nails and skin on your hands. I used a medium-heavy gauge sandpaper block. It worked well to remove what looked like maple syrup drips that would magically show up when painted.

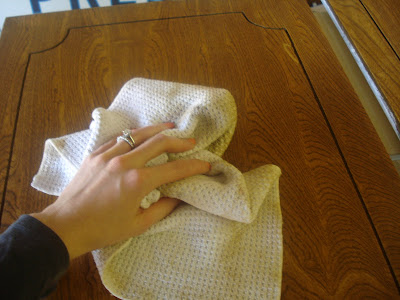
Our doors had mitered borders that liked to catch dust. I used a blow dryer to make sure that they were free and clear before brushing on the primer. Using a micro-fiber rag, I wiped down the doors to remove all excess dust.

Zinsser is always my first choice for primer. It gives you really nice coverage and dries fairly quickly.


One important thing to remember when painting the doors is to paint the backside first. This will insure that the front dries perfectly. After I applied the primer it took about two coats of paint to cover all of the wood grain. Then we just added new knobs and hinges that we bought in bulk from Home Depot. They made all of the difference in the world compared to the white and gold ceramic ones that were on the doors/drawers previously.
Cabinet doors before:

Cabinet doors after:

It is as easy as that. We have a ton of cabinets which is why our paint project took so long. Smaller areas go much faster, of course. Our hall bath cabinets only took me a single day to paint. Just take it one room at a time and from there, a single cabinet at a time. You can do it! When you do, please share your photos with the class.
No comments:
Post a Comment