We don't talk sports much around Facts of Lauren but sports are a huge part of our lives. Tonight was a very exciting and important night for the Dallas Mavericks - our team. It was game 4 in the Western Conference Playoffs and the OKC Thunder were up on us the ENTIRE game and we didn't even tie it up until the last few seconds, taking us into overtime. And would you believe that we dominated OT and won?
Believe. Go Mavs!!! Let's take them in Dallas on Wednesday.
Monday, May 23, 2011
Wednesday, May 18, 2011
The Great Outdoors
One thing that our sweet little house is lacking is a patio. We have two Mulberry trees that offer a ton of shade (which can be rare in Midland) and would be perfect paired with a lovely new patio.
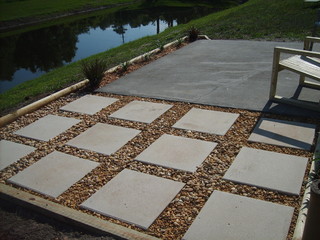
The kids over at Young House Love have given us inspiration this week. We don't need anything fancy. A simple outdoor tile or pavers are all we need. The tiles below are made of recycled tires and come in 18" squares.
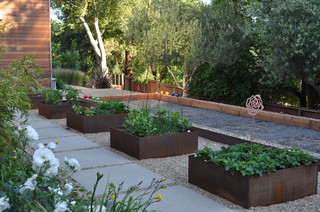
What is really lovely though is the mix of concrete, stone and space between. A little outdoor inspiration for your Wednesday morning.
contemporary porch design by seattle landscape architect ModernBackyard
Plus some killer patio furniture would be awesome too.
The Alfresco Grey Collection from Crate and Barrel is a perfect blend of mid-century, clean lines and modern comfort. Plus, all of their outdoor furniture is 15% off right now. Good thing that we don't have a patio yet!
When we get our patio underway I will let you know. For now, enjoy your own outdoor space while we enjoy our lawn-under-bum picnic style.
Tuesday, May 17, 2011
New Knobs
It is sort of silly how big a difference new hardware makes on a piece of furniture or cabinetry. New hinges, knobs and drawer pulls gave new life to our kitchen cabinets. Our secretary got a much needed face-lift from some fab knobs that I found at Target for $2.50 each. I had been hunting around the Anthropologie site for a while but just couldn't make myself spend $8 per knob. They are amazing but don't fit into my current budget for silly things like hardware.
Sad- one of the original knobs had broken off making it impossible to open the drawer without some sort of gadget or tool. I usually went with tweezers or needle-nose pliers. You do not want to mix those two utensils up come time to groom your brows.
All better.
Wednesday, May 11, 2011
His Closet
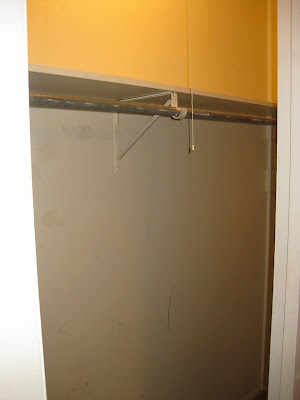
Who doesn't love a good before-and-after on a closet? I, for one, love them. When we moved into our 1960s era house our closets were more than lacking they were suffering. They were suffering from an ailment that I like to call, Underutilized Space Syndrome (USS). All of our bedroom closets are standard six foot reach-ins. They all looked very similar to this on move-in day:
For a girl who spends the better part of her days organizing other people's closets and homes this would just not do. Off to The Container Store (aka. Heaven on Earth) to get custom Elfa closet designs! We started by reconfiguring the two master closets and the nursery closet. Sorry guests, your closet will have to wait.
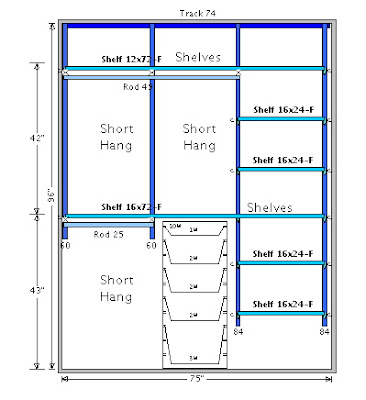
Here is what my Elfa designer and I came up with for the Hubs closet:
First things first, we had to tear out the existing closet components and make-ready the walls for our brand new Elfa closet. Such an improvement already!
From there it was just a half-dozen screws, placement and hanging of shelves and we were finished. Just to demonstrate how easy it can be, especially after a little practice, I hung the entire closet by myself. Nothing beats surprising your hub with some finely tuned organization. Buh-bye USS!
If you need some help with your closet, pantry, laundry room, garage, etc. just give me a shout! I can happily help from anywhere thanks to the interwebs and Skype.
Happy organizing!
A Ride with Style
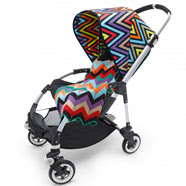
I found the epitome of swank strollers. Don't worry, even if you're not baby-minded right now you might appreciate this amazing designer pairing. The Bump gave a sneak peek at Bugaboo's Missoni special collection yesterday.
Only to be carried at Neiman Marcus and only to be wanted by all stylish tot-toters, the Dallas-based luxe retailer will begin carrying the stroller in July. As if the Bugaboo brand wasn't chic enough from association with celebrities and social elite alike, they had to cover it in the coveted and colorful Missoni styling. Yes, please!
You can find the Italian fashion house coverings on both the Cameleon and Bee models. Each special edition carriage will benefit (Product) RED and comes with a coordinating Missoni stroller blanket.
If anyone would be so kind as to send me one I wouldn't send it back. There's a chance I would attempt to frame it. Or put it in a large shadow box.
Images provided by The Bump and Bugaboo.
Sunday, May 8, 2011
Happy Mother's Day
"I love you forever. I love you for always. As long as I'm living, my baby you'll be." - Love You Forever by Robert Munsch
This is my mom's favorite children's book. I love you mom, happy Mother's Day.
And a very happy Mother's Day to all the mama's out there. Us moms-to-be look up to all of you.
Friday, May 6, 2011
Please, Enter
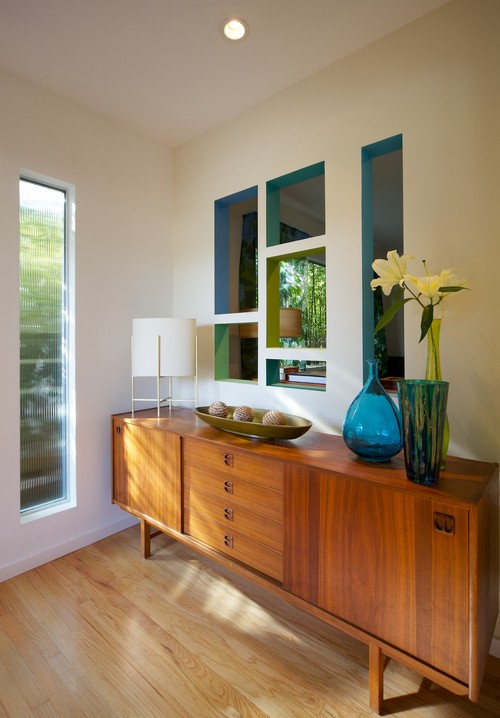
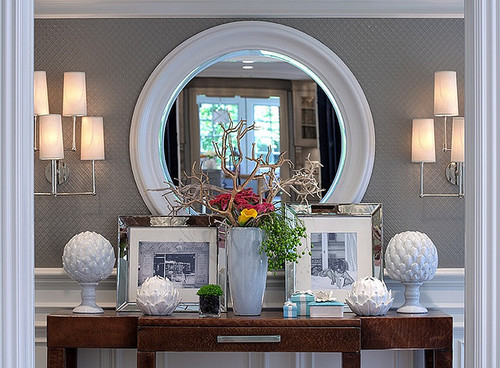
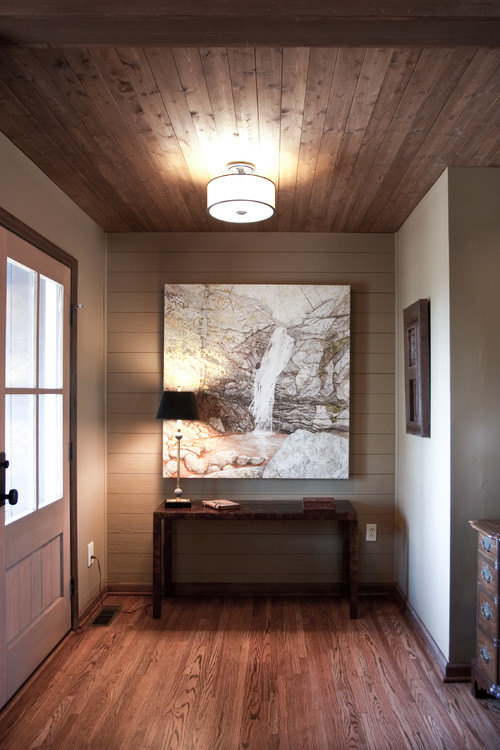
My entryway is naked. It's like encountering a streaker when you enter my house. There is just not much going on and that makes me sad. There is so much potential for this space. For example, I would like to do one of the following things on a possibly smaller scale.
Thursday, May 5, 2011
Hide-A-Pup
Dogs are the best, are they not? We all love them but don't always like to see (or smell) traces of them. This includes dog beds, toys, crates and their special "surprises." I know quite a few people who crate their dogs when they leave the house to prevent the latter. Crates are great (I appreciate unintentional rhyming), they keep pups safe and you have peace of mind.
But I doubt any of us love the look of the crate. It can really throw off the look you created in a beautiful room. Until now...
Thank you, Denhaus! The furniture designer has created dog crates that look and serve as end tables. They are beautiful and there is a design for every style. Here are just a couple of my favorites. But to add even more joy to this solution is the fact that for the next nine hours Denhaus is being featured on the fabulous sale site, Ideeli. We are talking major discounts, kiddos.
The ZenHaus
The Townhaus
Every dog needs a place of their very own.
Cinco De Mayo
Happy Cinco de Mayo, kids! This is one of my favorite holidays because it makes me think of the rich tapestry that is Mexican culture. I love the colorful joie de vivre of it all. And it is, colorful.
The color saturates everything from clothing, to jewelry, to art and pottery. You can see evidence of the influence in design stores everywhere. Both pottery pieces below can be found on Etsy.
The artist Frida Kahlo will always amaze me.
Fashion and home decor are easy venues that you can help you to incorporate a little Cinco de Mayo celebration into your life today. I'm in love with these appropriately named "Frida" earrings from Etsy seller, Tamar.
Gorgeous top from Anthropologie, a steal at $168. Sure.
If the top from Antrho is not in your budget, fret not. You can head down to your local mercado (if you live in Texas) or surf the net for handmade hacienda dresses. They will usually run you around $25. My sister-in-law and I love them and always pick one up whenever we are visiting our mother-in-law in San Antonio. Mine looked similar to the one below but I shortened the hem line for a little more modern fit. A cute belt around the waist makes it feel more like a flirty dress and less like a Mexican mumu.
The arcs on this Anthropologie quilt reminds me of flamenco dancers skirts in full-twirl. Who doesn't like a good twirl?
This chair would be my best friend. A cocoon of color.
Have a very happy Cinco de Mayo and please enjoy a margarita for me.
Cabinet How-To
Do you have out dated cabinets but don't want to fork over a ton of money to replace? Repaint them! You might have seen in our previous kitchen post that we repainted every cabinet, inside and out, in our kitchen recently. I highly recommend it for a less expensive update that will give you a major aesthetic impact.
Here's how we did it. We started by removing all of the cabinet doors and then pulled on our big girl pants (mom and I) and scrubbed the insides of the cabinets. Our cabinet interiors was unexpectedly scary.
Just kidding. It's like I say in my blog title, "Mostly facts, some fiction." Factually, most of them looked as though they had not been scrubbed since the house was originally built in 1961.
Now you see a door.
Now you don't. It's magic; I can tell that you're mystified right now. Don't be scared.
You can see that even without the doors there is a ton of cabinet surface to paint.
After the scrubbing came a little light sanding. We were lucky that our cabinets were solid wood throughout and did not have a heavy varnish on them. We tried a couple of different methods for painting the interiors of the cabinets, including spray paint, which we do not recommend. In the end it was easiest to use a small cabinet and doors roller (you can purchase these at any paint/home improvement store). They work great and give you even coverage.
After many, many coats of Valspar's Du Jour in semi-gloss finish we had all of the interiors and bases painted. We did this over the course of a few days to allow them to fully dry.
Look how happy we are! We started with this set of cabinets and were still very optimistic that it wouldn't take long at all. We were so wrong, but we did have fun.
This is clearly not a fashionable post. When working on one's house it is very important to look as unfortunate as possible. I did a pretty good job of that, if I do say so myself. (Pregger belly hanging over the jeans is clutch)
The cabinet doors were an entirely different beast that I wrestled with for weeks. The cabinet interiors taught me a valuable lesson: primer will save you time and paint. You will also need a good pair of work gloves, unless you don't mind having nails and skin on your hands. I used a medium-heavy gauge sandpaper block. It worked well to remove what looked like maple syrup drips that would magically show up when painted.
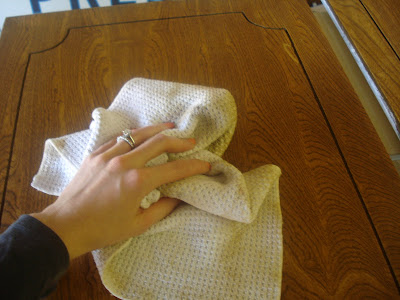
Our doors had mitered borders that liked to catch dust. I used a blow dryer to make sure that they were free and clear before brushing on the primer. Using a micro-fiber rag, I wiped down the doors to remove all excess dust.
Zinsser is always my first choice for primer. It gives you really nice coverage and dries fairly quickly.
One important thing to remember when painting the doors is to paint the backside first. This will insure that the front dries perfectly. After I applied the primer it took about two coats of paint to cover all of the wood grain. Then we just added new knobs and hinges that we bought in bulk from Home Depot. They made all of the difference in the world compared to the white and gold ceramic ones that were on the doors/drawers previously.
Cabinet doors before:
Cabinet doors after:
It is as easy as that. We have a ton of cabinets which is why our paint project took so long. Smaller areas go much faster, of course. Our hall bath cabinets only took me a single day to paint. Just take it one room at a time and from there, a single cabinet at a time. You can do it! When you do, please share your photos with the class.
Subscribe to:
Posts (Atom)